

Windows 11 was largely developed during the pandemic, so it’s no surprise that multitasking is one of its key strengths.
Millions of people shifted to working from home overnight in 2020, often relying on small laptop screens rather than their usual desktops in the office. Even in the current hybrid working model many companies have adopted, people need an operating system that can handle multiple apps at once – wherever they are.
For the most part, Windows 11 delivers that. There are some great multitasking features available, but it’s not always clear when and how you should be using them. In this article, we’ll run through everything you need to know about the four most useful.
Task View
Task View was introduced in Windows 10, but it remains a useful way to keep different projects (or work and personal info) separate from each other. Any open app is specific to a particular ‘desktop’, so it doesn’t appear if you open a new one.
To get started, simply click the Task View icon on the taskbar. It looks like one rectangle on top of another, and is usually between the search bar and Teams chat. Alternatively, you can use the Windows Key + Tab shortcut.
You should then be presented with a screen that looks like below. Click the + icon labelled ‘New desktop’ to create a second one, then simply click to start using it.
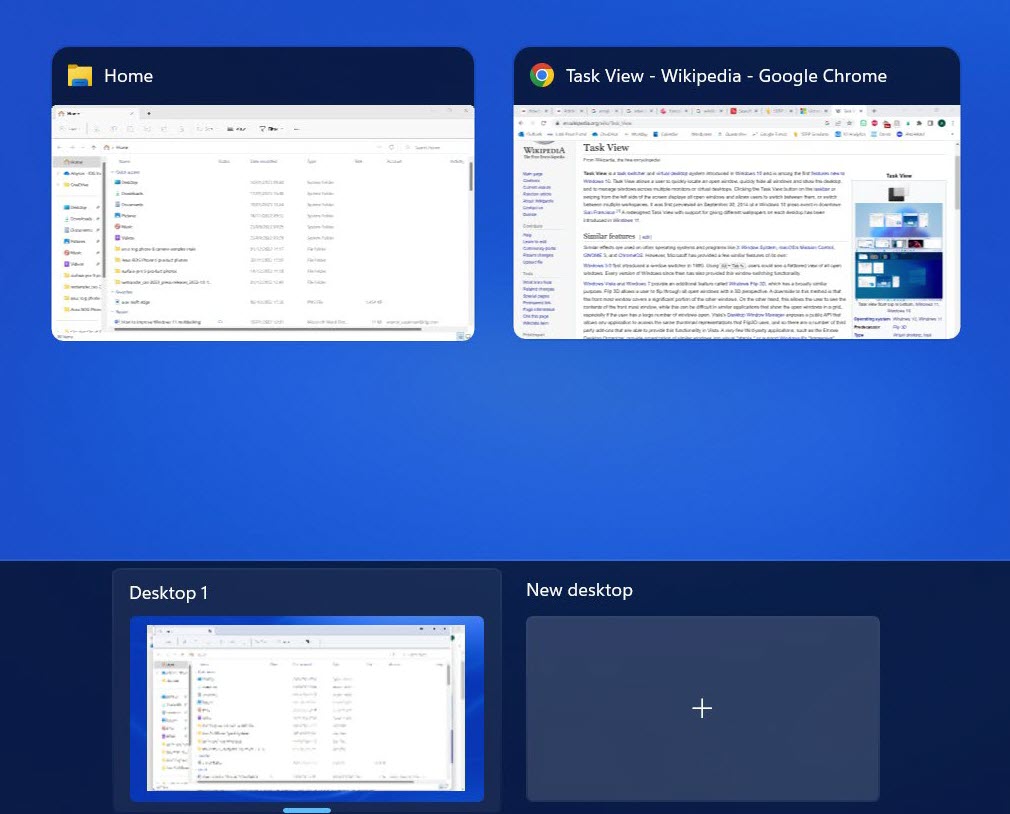
Anyron Copeman / Foundry
Within Task View, you can also drag desktops around to re-organise them, or right-click each to rename or change the background.
Task View also provides an overview of all the apps you have open. This is an easy way to find something specific or quickly close a few.
Snap Layouts
Snap Layouts is one of Windows 11’s most talked-about features, and with good reason. It makes any split-screen multitasking easy to set up and customise.
To get started, open any app you’d like to be in the layout and hover over the minimise icon (maximise if it’s not full screen). You’ll be presented with four options, ranging from two to four open windows.
Click any location you’d like, and the window will snap into position. You’ll then be prompted to add any open apps into the remaining positions. If the app you want to add hasn’t been opened yet, simply launch it like usual and use the same hover process to drop it into place.
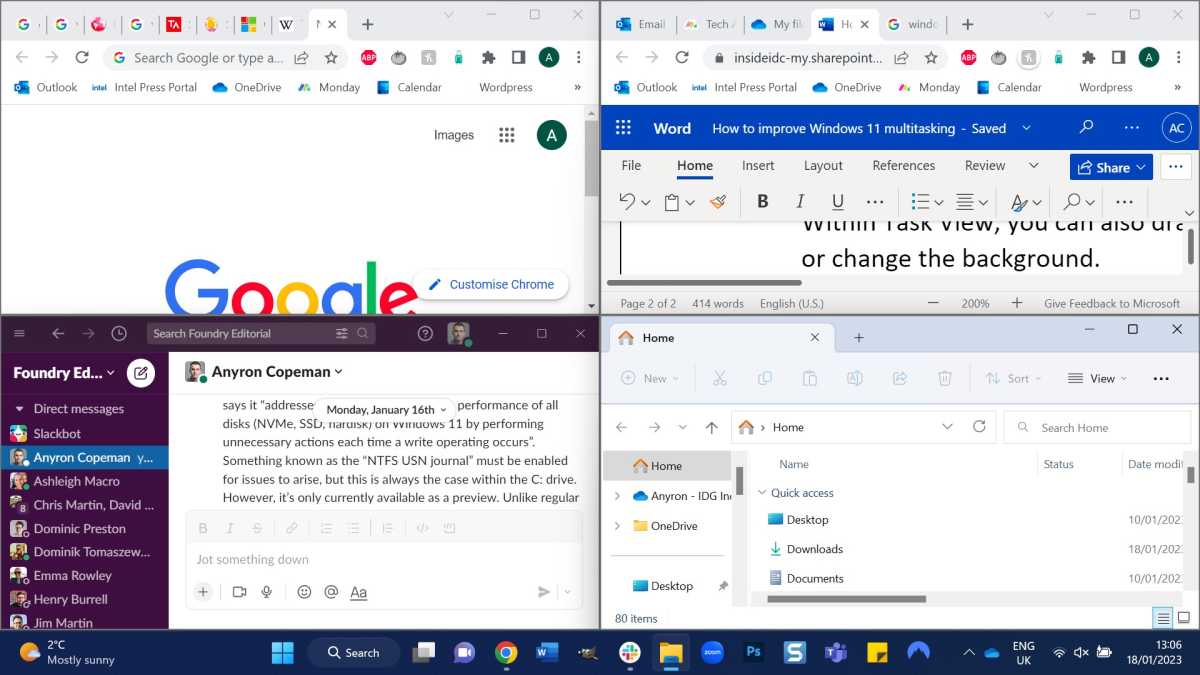
Anyron Copeman / Foundry
You’ll now have a ‘Snap Group’ which can be used independently of any other app. Just hover over any of the apps in the layout and you should see a group appear.
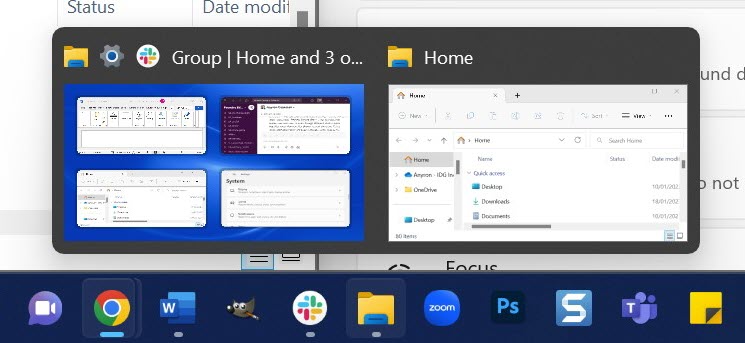
Anyron Copeman / Foundry
FancyZones
Snap Layouts is great, but there are only four options to choose from. You can adjust the size of each window, but that’s about it.
Enter FancyZones, one of Microsoft’s optional PowerToys tools. As the name suggests, these designed for power users, but anyone can install it and make use of the extra multitasking options.
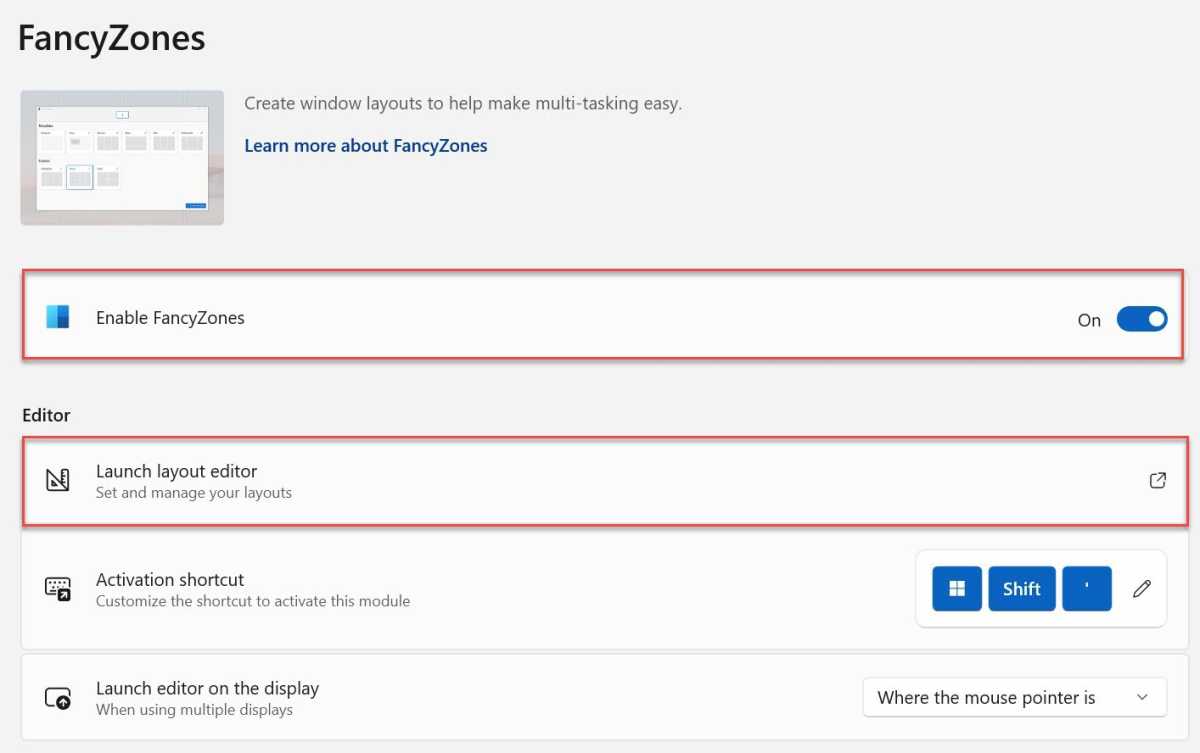
To get started, download and install Microsoft PowerToys from the Microsoft Store. Open the app, then click the three bars in the top-left corner and select ‘FancyZones’. Make sure the toggle is set to the on position.
Now, click ‘Launch layout editor’. Each of the five main presets can be customised (via the pen icon) by number of zones, highlight distance (amount of space between zones before they snap together) and space around zones in most cases. There’s also the option to create something completely unique.
It’s now time to start using your preferred layout:
- Minimise or close all open windows so you just see the desktop
- Open a window you’d like to add to the layout
- Hold down the Shift key while dragging the window (using the title bar at the top) until you see the layout you’ve chosen
- Drop it into any of the highlighted zones and it will snap into place
- Repeat steps 3-4 for any further windows. Once complete, you should see something which looks like the screenshot below
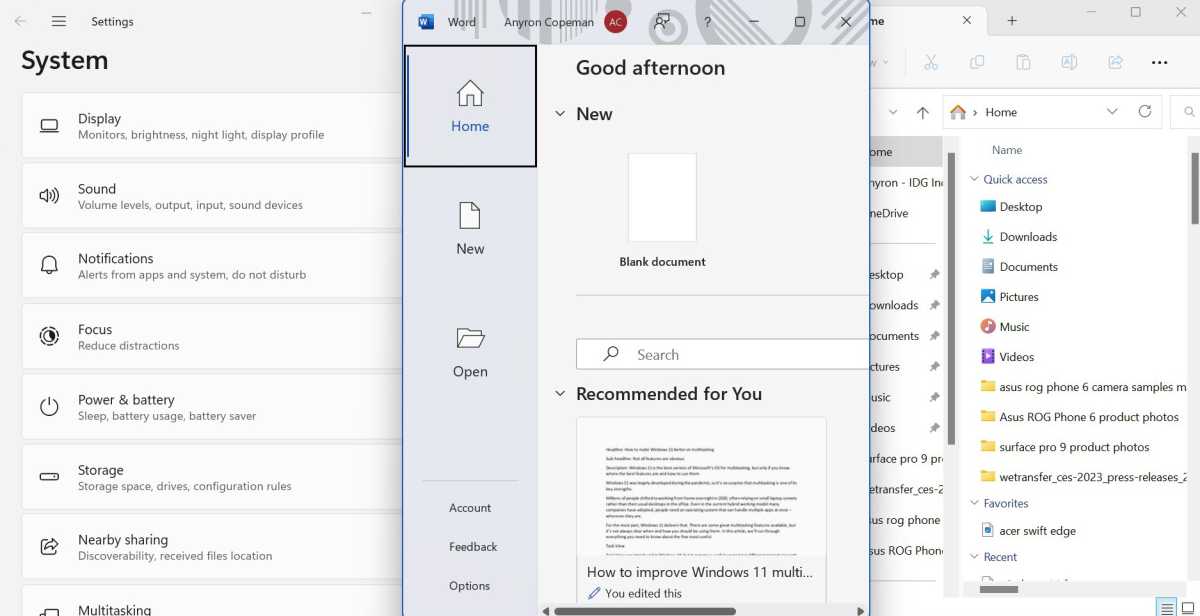
Anyron Copeman / Foundry
Within the FancyZones section of the PowerToys Settings app, there are lots more customisation options to choose from. It’s worth trying a few and seeing what works for you.
Anyron Copeman / Foundry
Keep the same arrangement after restarting
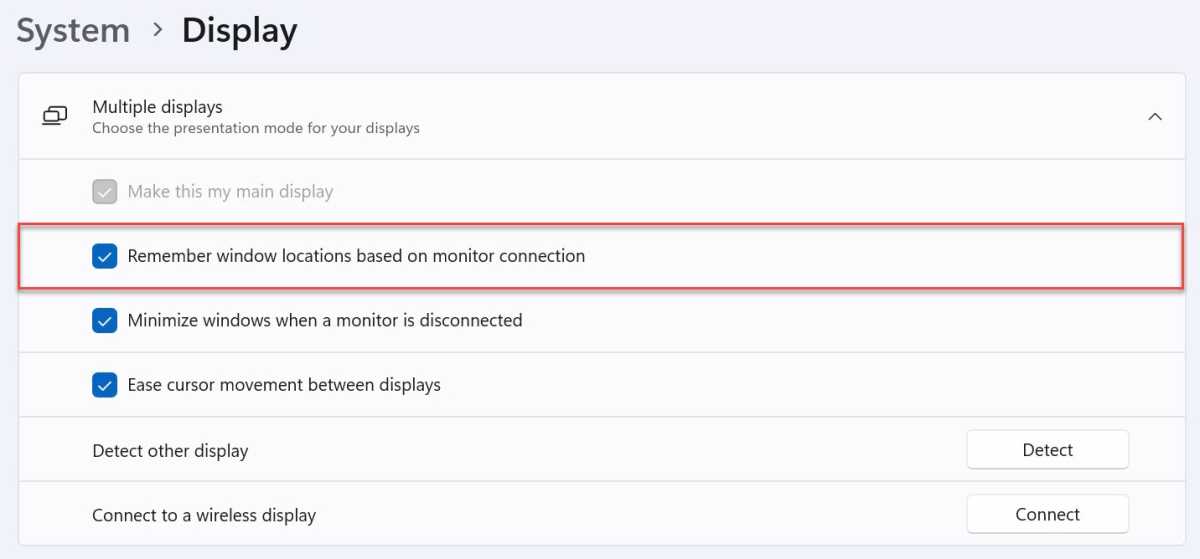
If you have more than one display, there’s probably a specific layout of apps that works for you. Rather than manually setting this up each time your device restarts, Windows 11 can remember this.
Just head to Settings > System > Display > Multiple Displays and tick the box next to ‘Remember window locations based on monitor connection.
Anyron Copeman / Foundry
Related articles
Author: Anyron Copeman, Senior Staff Writer

As the resident expert on Windows, Senior Staff Writer Anyron’s main focus is PCs and laptops. Much of the rest of his time is split between smartphones, tablets and audio, with a particular focus on Android devices.